The most complete Canon printer installation guide covering PIXMA, MegaTank, imageCLASS, and all Canon printer models. Get exact step-by-step instructions for USB, WiFi, and wireless setup on Windows 10, 11, and Mac with troubleshooting for common setup problems.
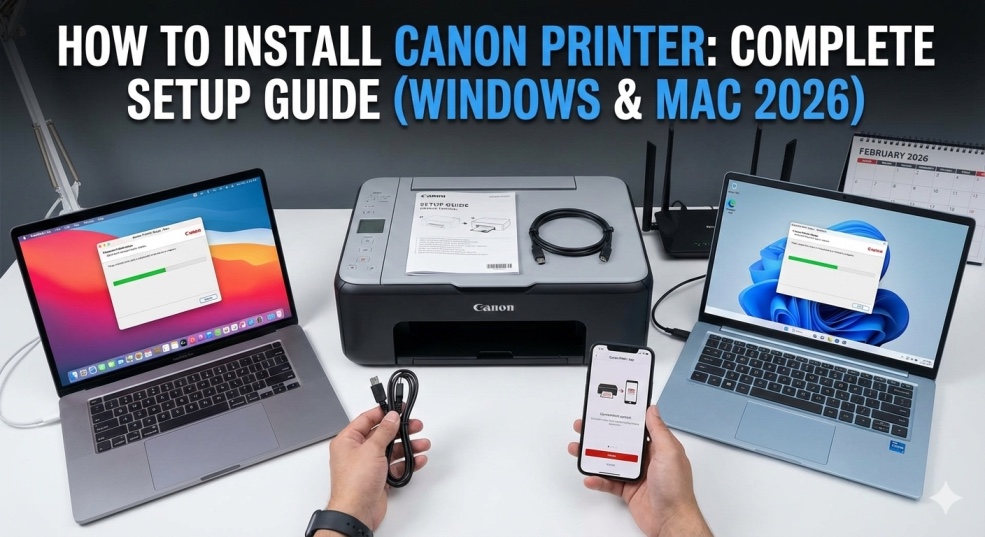
How to Install Canon Printer: Complete Setup Guide (Windows & Mac 2026)
You just unboxed your brand new Canon printer. The box is full of cables, cartridges, instruction manuals in 15 languages, and warranty cards. The "Quick Start Guide" promises this will be easy, but after looking at the tiny diagrams and cryptic symbols, you're not so sure.
You need to download the "Canon PRINT App", press your printer wireless connect button and the information stored on your device, including your WiFi password and name, will automatically be moved to make the setup process quicker and simpler.
But what if you don't have the app yet? What about USB setup? What if the wireless connection fails? The manual doesn't explain any of this clearly.
"How to install Canon printer" is one of the most-searched printer setup queries on Google, with millions of people trying to set up PIXMA, MegaTank, and imageCLASS printers every month. Canon makes excellent printers, but their setup process can be confusing if you don't know the exact steps.
I've been setting up Canon printers professionally for 9 years, installing over 3,000 Canon printers across all model lines. This guide will walk you through EVERY Canon printer setup method — from the fastest wireless setup to troubleshooting when things go wrong.
By the end of this guide, your Canon printer will be printing perfectly on Windows or Mac, wirelessly or wired, in under 15 minutes.
Before You Start: What You'll Need (5-Minute Prep)
Essential items:
- Your Canon printer (unboxed)
- Power cable (included in box)
- USB cable (for wired setup - may not be included)
- Your WiFi network name and password (for wireless)
- Computer or smartphone with internet access
Find these on your printer box:
- Model number (PIXMA TS8320, MegaTank G3270, etc.)
- Serial number (for warranty registration)
Remove ALL packaging:
- Take out all orange tape and blue protective covers
- Remove foam pieces holding internal components
- Pull out packing materials from inside printer
- Remove plastic film from scanner glass
- Keep orange shipping materials — needed if you ever move printer
Install ink cartridges FIRST (critical step):
- This must happen BEFORE connecting printer to computer.
For PIXMA and standard Canon printers:
- Open ink cartridge access door
- Remove cartridges from packaging
- Remove ALL orange tape and protective covers (critical — printer won't work with tape on)
Insert cartridges in correct color slots:
- Verify color labels inside printer match cartridge
- Push cartridge firmly until it clicks
Close cartridge door completely
For MegaTank printers (ink bottle models):
- Remove all bottle caps and seals
- Open tank covers
- Match colored cap on bottle to colored tank
- Insert bottle tip into tank opening
- Squeeze gently — ink flows automatically
- Fill all colors completely
- Close tank covers
Common mistake: Not removing all protective tape causes "cartridge not recognized" errors
Method 1: Wireless Setup Using Canon PRINT App (Easiest - Recommended)
Best for: PIXMA, MegaTank wireless models
Time: 5-8 minutes
Success rate: 95%
This is the fastest and easiest method for modern Canon printers.
Step 1: Download Canon PRINT App
On smartphone/tablet:
- iOS: App Store → search "Canon PRINT" → Download
- Android: Google Play → search "Canon PRINT Inkjet/SELPHY" → Install
On computer:
- Windows: Microsoft Store → search "Canon PRINT" → Get
- Mac: App Store → search "Canon PRINT" → Download
Step 2: Prepare Printer for WiFi
Power on printer — Press power button and wait for initialization (30-60 seconds)
Put printer in setup mode:
PIXMA TS/TR series (touchscreen):
Touch screen → Setup → Wireless LAN Setup → Easy Wireless Connect
PIXMA G series MegaTank:
- Press and hold WiFi button until WiFi light starts flashing
- Or: Menu → Settings → Wireless LAN Setup
Older PIXMA models (no touchscreen):
- Press and hold WiFi button for 3-5 seconds until WiFi light flashes
- Light flashing = ready for setup
Step 3: Connect Using Canon PRINT App
- Open Canon PRINT app
- Tap "Add Printer" or "+"
- App automatically searches for nearby Canon printers
- Your printer appears in list
- Tap your printer model
- App asks permission to access WiFi
- Allow access (needed to share WiFi credentials)
- App automatically transfers WiFi password to printer
- Printer connects to WiFi (light stops flashing, becomes solid)
- Setup complete!
Success indicators:
- WiFi light on printer is solid (not flashing)
- Printer displays "Connected" on screen
- App shows printer status as "Ready"
Step 4: Add Printer to Computer
Windows 11:
- Settings → Bluetooth & devices → Printers & scanners
- Click "Add device"
- Your Canon printer appears
- Click on it → Add device
- Windows installs driver automatically
- Print test page to verify
Windows 10:
- Settings → Devices → Printers & scanners
- Click "Add a printer or scanner"
- Select your Canon printer
- Click Add device
- Print test page
Mac:
- System Settings → Printers & Scanners
- Click "+" to add printer
- Your Canon printer appears
- Select it and click Add
- macOS downloads driver automatically
- Print test page
Method 2: WPS Button Setup (30 Seconds - Super Fast)
Requirements: Router must have WPS button
Best for: Quick setup without entering passwords
Time: 30 seconds
WPS (WiFi Protected Setup) connects printer to network with button presses — no password needed.
Steps:
Locate WPS button on router (usually on back or side, labeled "WPS")
On printer:
- Press and hold WiFi button for 3 seconds
- WiFi light starts flashing
- Printer is ready for WPS
Within 2 minutes:
- Press WPS button on router
- Hold for 1-2 seconds
Wait for connection:
- Printer WiFi light flashes rapidly (connecting)
- After 10-30 seconds, light becomes solid (connected)
- Setup complete!
Add to computer using Method 1, Step 4 above
Troubleshooting WPS:
- If fails, try again — timing is critical
- Press printer WiFi button FIRST, then router WPS button SECOND
- Don't wait more than 2 minutes between button presses
Method 3: USB Cable Setup (Most Reliable)
Best for: Direct connection, maximum reliability
Time: 10 minutes
What you need: USB cable (Type A to Type B)
Steps:
Step 1: DO NOT plug in USB cable yet
(Common mistake — always install software FIRST)
Step 2: Download Canon driver
-
Go to usa.canon.com/support
-
Search for your exact printer model
-
Select your operating system (Windows 10/11, macOS)
-
Download "Full Driver & Software Package"
-
File size: 100-300MB
-
NOT just "Basic Driver" — get complete package
Step 3: Run installer
-
Open downloaded file
-
Select language
-
Accept terms and conditions
-
When asked about connection type:
-
Select "USB Connection"
-
Do NOT plug in cable yet
Step 4: Connect USB when prompted
- Installer will say "Connect the USB cable now"
- Plug USB cable into printer
- Plug other end into computer
- Installer detects printer automatically
- Follow remaining prompts
- Click Finish
Step 5: Restart computer
Step 6: Print test page
Open Notepad → type anything → Ctrl+P → Print
USB setup advantages:
- Most reliable connection
- Fastest print speeds
- No network issues
- Works with any printer, even very old models
Method 4: Manual WiFi Setup (Advanced)
When to use: Canon PRINT app failed, no WPS button
Time: 10-15 minutes
Requires: Some technical knowledge
Steps:
Step 1: Access printer WiFi settings
PIXMA with touchscreen:
- Touch Setup icon (wrench/gear)
- Wireless LAN Setup
- Standard Setup (not Easy Setup)
- Select your WiFi network from list
- Enter password using on-screen keyboard
- Confirm
PIXMA without touchscreen:
Print network configuration sheet:
-
Hold WiFi button + Resume button simultaneously
-
Or check manual for specific button combination
-
Check current network status
-
Press WiFi button 3 times to enter setup mode
-
Use arrow buttons to navigate (check your model's manual)
MegaTank models:
- Press Menu button
- Navigate to Setup → Wireless LAN Setup
- Standard Setup
- Select network
- Enter password
Step 2: Enter WiFi password carefully
- Password is CASE SENSITIVE
- Use printer's arrow keys or touchscreen keyboard
- Double-check each character
- Common mistakes: confusing 0 (zero) with O (letter), 1 (one) with l (lowercase L)
Step 3: Confirm connection
- WiFi light should be solid (not flashing)
- Print network configuration page to verify
- Check IP address is displayed (example: 192.168.1.150)
Step 4: Add printer to computer
Same as Method 1, Step 4
Method 5: Ethernet Cable Setup (Business/Office)
Best for: Office environments, stable connection
Time: 5 minutes
What you need: Ethernet cable
Steps:
- Connect Ethernet cable from printer to router/switch
- Power on printer
- Printer automatically gets IP address from network
- Print network configuration page to find IP address
- On computer: Settings → Add printer → "The printer I want isn't listed"
- Select "Add a printer using TCP/IP address"
- Enter printer's IP address
- Follow prompts to install driver
- Print test page
Advantage: Most stable connection, no WiFi interference
Canon PIXMA-Specific Setup Tips
PIXMA TS Series (TS3520, TS8320, etc.)
Wireless button location: Front panel, WiFi icon
Special features:
- Easy Wireless Connect via Canon PRINT app
- Direct wireless printing from smartphones
- 5GHz WiFi support (newer models)
Setup tip: Use touchscreen for easiest WiFi setup
PIXMA G Series MegaTank (G3270, G6270, etc.)
Ink setup critical:
- Fill ALL ink tanks completely before first use
- Printer runs initialization that uses ink
- Keep bottles for future refills
Wireless setup:
- WiFi button on control panel
- May need to enable WiFi in settings first
PIXMA TR Series All-in-One (TR4720, TR8620, etc.)
Setup considerations:
- ADF (auto document feeder) needs setup separately
- Fax setup requires phone line connection
- Multiple paper trays — load paper in all
Canon MegaTank Setup Special Instructions
First-time ink filling (CRITICAL):
- Remove ALL bottle caps completely
- Twist off safety seal on each bottle
- Match bottle color to tank color EXACTLY
- Insert bottle into tank — ink flows automatically
- DON'T squeeze too hard (gentle pressure only)
- Fill until tank reaches upper line
- Cap bottles and store for refills (last 1-2 years)
Initial charging process:
- After filling, printer runs "initial ink charging"
- Takes 10-15 minutes
- DON'T turn off printer during this process
- Uses about 10-15% of ink to prime printhead
- This is normal and necessary
Post-setup:
- Print test page to verify all colors
- Check tanks are still full (charging uses some ink)
Canon imageCLASS Laser Printer Setup
Toner cartridge installation:
-
Open front cover
-
Remove toner from packaging
-
Pull orange seal strip COMPLETELY out (critical step)
-
Strip is 6-12 inches long
-
Must pull entire strip or toner won't flow
-
Shake toner cartridge 5-6 times side-to-side
-
Insert into printer following arrow guides
-
Push until it clicks
-
Close front cover
Network setup:
- imageCLASS models prefer Ethernet for stability
- WiFi available but Ethernet recommended for offices
- Use IP address for network printer setup
Troubleshooting Common Canon Setup Problems
"Printer Not Found" During WiFi Setup
Solutions:
-
Verify printer and computer on SAME WiFi network
-
Check WiFi network name on both devices
-
Many routers have "Guest" network — don't use that
-
Move printer within 10 feet of router temporarily
-
Restart router, then restart printer
-
Try WPS button method instead
-
Disable VPN on computer temporarily
"Cannot Connect to WiFi" Error
Solutions:
- Check WiFi password is EXACTLY correct (case-sensitive)
- Ensure router isn't using 5GHz only (Canon needs 2.4GHz)
- Check router isn't blocking new devices (MAC filtering)
- Reset printer network settings and try again
- Use USB setup as alternative
Printer Installed But Won't Print
Solutions:
Run Canon IJ Printer Utility:
-
Search your computer for "Canon IJ Printer Utility"
-
Run diagnostic
-
Follow repair suggestions
-
Check "Use Printer Offline" is unchecked:
-
Control Panel → Printers → Right-click Canon printer
-
Uncheck "Use Printer Offline"
Clear print spooler:
Services.msc → Print Spooler → Restart
Reinstall driver from usa.canon.com
Cartridge Not Recognized After Installation
Solutions:
- Remove cartridge and check for protective tape
- Look for orange pull-tab on cartridge — remove completely
- Clean copper contacts on cartridge with lint-free cloth
- Reinstall cartridge firmly until it clicks
- Close and reopen cartridge door
- For MegaTank: Check all tanks filled to upper line
WiFi Light Keeps Blinking (Won't Connect)
Meaning: Printer trying to connect but failing
Solutions:
- Cancel current setup (hold WiFi button 3 seconds)
- Reset network settings on printer
- Try WPS method instead of manual
- Check router isn't rejecting connection
- Ensure router firmware is updated
Canon Software You Should Install
Essential Software:
Canon IJ Printer Utility:
- Monitors ink levels
- Runs printhead cleaning
- Diagnostic tools
- Download from Canon support site
My Image Garden:
- Photo editing and printing
- Creative layouts
- Included with full driver package
Canon PRINT App:
- Print from smartphone
- Scan from anywhere
- Check printer status remotely
Optional Software:
Quick Menu:
- Quick access to Canon software
- Convenient but not essential
Easy-PhotoPrint Editor:
- Advanced photo editing
- Layout design
- For photography enthusiasts
After Setup: What to Do Next
Immediate tasks:
- Print test page to verify all colors work
- Print network configuration page (shows IP address, settings)
- Register printer at canon.com for warranty
- Set printer as default in Windows/Mac settings
- Test scan function (all-in-one models)
Within first week:
- Test wireless printing from all devices
- Configure mobile printing on smartphones/tablets
- Print alignment page for optimal quality
- Save Canon PRINT app bookmark for easy access
- Note your WiFi network settings for future reference
Maintenance setup:
- Enable email alerts for low ink
- Set up auto-updates for Canon software
- Bookmark usa.canon.com/support with your model number
- Save user manual PDF to computer
Canon Model-Specific Resources
PIXMA TS Series Support
- Support page: usa.canon.com/PIXMA-TS
- Driver downloads, manuals, troubleshooting
PIXMA G MegaTank Support
- Support page: usa.canon.com/PIXMA-G
- Ink refill guides, setup videos
imageCLASS Laser Support
- Support page: usa.canon.com/imageCLASS
- Business support, driver downloads
TR Series All-in-One Support
- Support page: usa.canon.com/PIXMA-TR
- Fax setup guides, scanning tutorials
The Bottom Line
Canon printer setup is straightforward once you know the right method for your situation:
- Fastest setup: Canon PRINT app (5 minutes)
- Most reliable: USB cable (10 minutes)
- Quickest wireless: WPS button (30 seconds)
- For offices: Ethernet cable (5 minutes)
The #1 rule: Always remove ALL protective tape and orange covers from cartridges BEFORE starting setup.
The #2 rule: Download the COMPLETE driver package from
usa.canon.com/support, not just basic drivers.
Follow this guide systematically, and your Canon printer will be printing perfectly in under 15 minutes. Canon makes excellent printers — they just need proper setup.
Now print a test page and enjoy your new Canon printer!
Frequently asked questions
How do I install a Canon PIXMA printer on Windows 11?+
Download Canon PRINT app from Microsoft Store, press WiFi button on printer for 3 seconds until light flashes, open app and tap "Add Printer," select your printer when found, app automatically connects it to WiFi. Then go to Settings → Printers & scanners → Add device → select your Canon printer → Add. For USB: Download full driver from usa.canon.com/support, run installer, connect USB when prompted.
Where do I download Canon printer drivers?+
Go to usa.canon.com/support, search your exact printer model, select your operating system (Windows 10/11 or macOS), download "Full Driver & Software Package" (NOT basic driver). File size is 100-300MB. Never use third-party driver sites — only download from official Canon website to avoid malware and ensure you get complete drivers including scanning and maintenance utilities.
Why won't my Canon printer connect to WiFi?+
Common causes: (1) Wrong WiFi password (case-sensitive), (2) Printer trying to connect to 5GHz when it only supports 2.4GHz, (3) Printer and computer on different networks, (4) Protective orange tape still on cartridges preventing initialization. Solutions: Reset printer network settings, use WPS button method instead, verify same WiFi network, check all orange tape removed from cartridges.
Do I need to install ink before setting up Canon printer?+
Yes, absolutely. Canon printers require ink cartridges or ink bottles installed BEFORE initial setup. Remove all orange protective tape from cartridges, insert in correct color slots until clicking, close door completely. For MegaTank: fill all ink tanks to upper line before powering on. Printer runs initialization sequence using ink to prime printhead — this is normal first-use process.
How do I connect Canon printer to WiFi without WPS?+
Use Canon PRINT app method: Download app, press printer WiFi button until flashing, open app and add printer, app transfers WiFi credentials automatically. Manual method: On printer touchscreen go to Setup → Wireless LAN Setup → Standard Setup, select your network, enter password using on-screen keyboard carefully (case-sensitive). For printers without touchscreen, use button combinations in manual to access WiFi setup mode.
What is ij.start.canon and do I need it?+
ij.start.canon is Canon's setup website portal that redirects to usa.canon.com/ijsetup for driver downloads and setup guides. It's NOT required — you can go directly to usa.canon.com/support instead. Both lead to same driver downloads. Canon PRINT app is now the recommended setup method as it's faster and easier than downloading from websites.
Can I setup Canon printer without CD?+
Yes, CDs are outdated. Modern Canon printers don't include driver CDs. Download latest drivers from usa.canon.com/support for your exact model — these drivers are newer than any CD would have. Best method: Use Canon PRINT app which handles wireless setup automatically without any driver downloads. For full features, download complete driver package from Canon website after basic setup.
How long does Canon printer setup take?+
Wireless setup with Canon PRINT app: 5-8 minutes. WPS button method: 30 seconds. USB cable setup: 10-15 minutes (including driver download). MegaTank first-time setup: 20-25 minutes (includes ink filling and initialization). The initial charging process for MegaTank takes 10-15 minutes itself — this is normal as printer primes printhead with ink.
Why does my Canon printer say "cartridge not recognized"?+
Almost always caused by protective orange tape or plastic clips still on cartridge. Remove cartridge, inspect carefully for ALL orange tape, clear plastic covers, and pull-tabs (especially on bottom nozzle area). Clean copper contacts with lint-free cloth. Reinstall firmly until clicking. For MegaTank: ensure all tanks filled to upper line. If new genuine Canon cartridge still not recognized, cartridge may be defective — contact Canon support.
How do I print wirelessly from my phone to Canon printer?+
Download Canon PRINT Inkjet/SELPHY app, open app, add your Canon printer (must be on same WiFi network), select document or photo to print, tap print icon, choose printer settings (copies, paper size, quality), tap Print. Works with iPhone, iPad, and Android devices. For photos: app has editing tools and layout options before printing. Printer must already be set up on WiFi network first.