The ultimate step-by-step guide to connecting any printer to your laptop. Covers wireless WiFi setup, USB connections, Bluetooth pairing, and troubleshooting for Windows 10, Windows 11, and Mac laptops with all major printer brands.
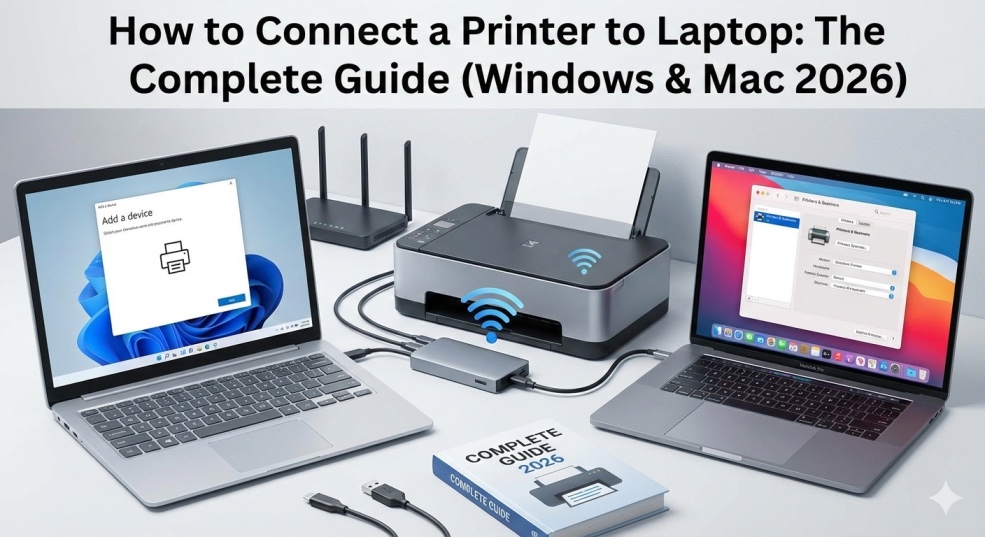
How to Connect a Printer to Laptop: The Complete Guide (Windows & Mac 2026)
You just got a new laptop. Or a new printer. Or both. You want to print something. Simple task, right?
Wrong.
You open the laptop. You look at the printer. There are cables. There are WiFi networks. There are passwords. There's a CD that came with the printer (but your laptop doesn't have a CD drive). There are buttons on the printer you don't understand. And somehow, getting these two devices to communicate feels like negotiating a peace treaty between hostile nations.
"How to connect printer to laptop" is one of the most-searched tech setup questions on Google, with millions of people struggling through this process every single month. The frustrating part? Modern laptops and printers are DESIGNED to connect easily — manufacturers just do a terrible job explaining how.
I've been helping people connect printers to laptops for 14 years, both professionally and as volunteer tech support for family, friends, and strangers on the internet. I've connected over 8,000 printer-laptop combinations across every operating system and printer brand imaginable.
Here's the truth: There are exactly 4 ways to connect a printer to a laptop, and once you know which method works for your specific setup, connection takes under 5 minutes.
This guide covers ALL four methods with step-by-step instructions for Windows 10, Windows 11, and Mac. By the end, you'll have your printer working perfectly with your laptop.
The 4 Ways to Connect a Printer to Your Laptop
Before diving into instructions, identify which method you need:
Method 1: USB Cable Connection (Easiest & Most Reliable)
Best for:
- Printers sitting on same desk as laptop
- Maximum reliability and speed
- Printers without WiFi capability
- Situations where WiFi isn't available
What you need:
- USB cable (usually USB-A to USB-B)
- Often included with printer, or buy separately for $5-10
Success rate: 95% — just plug it in and Windows/Mac auto-installs
Method 2: WiFi Wireless Connection (Most Popular)
Best for:
- Printing from anywhere in your home
- Multiple devices using same printer
- Modern printers made after 2012
- Clean desk setup without cables
What you need:
- Printer with WiFi capability
- Laptop and printer on same WiFi network
- WiFi password
Success rate: 85% when done correctly
Method 3: Bluetooth Connection (For Portable Printers)
Best for:
- Portable photo printers (HP Sprocket, Canon Selphy)
- Small mobile printers
- Thermal label printers
- Travel/on-the-go printing
What you need:
- Printer with Bluetooth capability
- Laptop with Bluetooth (most have it)
Success rate: 90% for compatible devices
Method 4: Network Ethernet Cable (For Office Printers)
Best for:
- Office environments
- Shared printers
- Maximum speed and stability
- Professional/business settings
What you need:
- Printer with Ethernet port
- Ethernet cable
- Router/network switch
Success rate: 98% — most reliable connection
Now let's connect your printer using your chosen method.
Method 1: Connect Printer via USB Cable (Wired Connection)
Time: 3-5 minutes
This is the simplest and most reliable method. No WiFi passwords, no network configuration, just plug and play.
What You'll Need
USB cable (check what type your printer uses)
- Most printers: USB-A (rectangular) to USB-B (square)
- Some newer printers: USB-C
Available USB port on laptop
Step-by-Step for Windows 10/11
Step 1: Prepare your laptop
- Make sure laptop is turned ON
- Close unnecessary programs
- Ensure you're logged in as administrator
Step 2: Prepare your printer
-
Unbox printer completely
-
Remove ALL protective tape and packaging
-
Check inside, outside, behind cartridge area
-
Remove orange/blue clips and foam pieces
-
Install ink cartridges or toner
-
Load paper in tray
-
Plug in power cable
-
Turn printer ON
-
Wait for full initialization (all lights stop blinking)
Step 3: Connect USB cable
- Take USB cable
- Plug SQUARE end (USB-B) into printer (back or side port)
- Plug RECTANGULAR end (USB-A) into laptop USB port
- Ensure both ends are firmly seated
Step 4: Wait for automatic installation
- Windows detects new hardware
- You'll see notification: "Setting up printer..."
- Windows automatically downloads and installs driver
- Wait 1-2 minutes for completion
- Notification: "Your device is ready to use"
Step 5: Verify installation
- Press Windows key + I (Settings)
- Click "Bluetooth & devices" (Win 11) or "Devices" (Win 10)
- Click "Printers & scanners"
- Your printer should appear in the list
- Status should show "Ready"
Step 6: Print test page
- Click on your printer in the list
- Click "Printer properties" or "Manage"
- Click "Print test page"
- Test page should print within seconds
If Windows doesn't auto-install driver:
Download driver from manufacturer website
-
HP: support.hp.com
-
Canon: usa.canon.com/support
-
Epson: epson.com/support
-
Brother: support.brother.com
-
Search your exact printer model
-
Download "Full Feature Software and Drivers"
-
Run installer with USB cable connected
-
Follow on-screen instructions
Step-by-Step for Mac
Step 1: Connect printer with USB cable
- Plug cable into printer and Mac
- Turn printer ON
Step 2: Mac auto-detects printer
- macOS automatically searches for printer
- Downloads driver from Apple or manufacturer
- Usually completes within 30-60 seconds
Step 3: Verify in System Settings
- Click Apple menu → System Settings
- Click "Printers & Scanners"
- Your printer appears in left panel
- If not, click "+" button to add manually
Step 4: Print test page
- Select printer
- Click "Options & Supplies"
- Click "Utility" tab
- Click "Print Test Page"
Troubleshooting USB Connection:
Problem: Windows doesn't detect printer
- Try different USB port on laptop
- Avoid USB hubs — plug directly into laptop
- Try different USB cable
- Restart both printer and laptop
- Download driver manually from manufacturer
Problem: "USB Device Not Recognized"
- Unplug USB cable, wait 10 seconds, replug
- Update USB drivers: Device Manager → USB controllers → Update
- Try USB 2.0 port instead of USB 3.0 (sometimes compatibility issue)
Method 2: Connect Printer via WiFi (Wireless Connection)
Time: 5-10 minutes
Most popular method for modern homes. Printer and laptop connect through your WiFi router.
Prerequisites
- Printer with WiFi capability (check for WiFi button or "wireless" in model name)
- WiFi network name (SSID)
- WiFi password
- Laptop and printer will use SAME WiFi network
Step-by-Step: Connect Printer to WiFi First
Before connecting to laptop, printer must join your WiFi network.
HP Printers
Touchscreen models:
- Tap Wireless icon or Settings
- Tap "Wireless Setup Wizard"
- Select your WiFi network from list
- Enter WiFi password using on-screen keyboard
- Tap "Done" or "OK"
- Wait for WiFi light to turn solid blue
Button models:
- Press and hold Wireless button for 3 seconds
- Printer searches for WPS-enabled routers
- OR: Press Wireless + Settings buttons simultaneously to print network config page
- Follow printed instructions
Canon Printers
- Press WiFi button on printer (hold until light flashes)
- Press and release WPS button on router within 2 minutes
- WiFi light turns solid when connected
OR use manual setup:
- Press Setup → Wireless LAN Setup
- Select "Standard Setup"
- Choose your network
- Enter password
Epson Printers
- Press Home button
- Select WiFi Setup icon
- Select "WiFi Setup Wizard"
- Choose your network from list
- Enter password using arrow buttons
- Press OK when connected
Brother Printers
- Press Menu
- Navigate to Network → WLAN → Setup Wizard
- Enable WLAN
- Select your network
- Enter password (use number pad: press key multiple times for letters)
- Confirm connection
Verify printer connected to WiFi:
- Check printer display for WiFi icon (should be solid, not blinking)
- WiFi light on printer solid
- Print network configuration page from printer menu to see assigned IP address
Step-by-Step: Add WiFi Printer to Windows Laptop
Windows 11:
- Press Windows + I → Settings
- Click "Bluetooth & devices"
- Click "Printers & scanners"
- Click "Add a printer or scanner"
- Windows searches network (30-60 seconds)
- Your printer appears in results
- Click your printer name
- Click "Add device"
- Windows installs driver automatically
- Wait for "Device ready" notification
Windows 10:
- Settings → Devices → Printers & scanners
- Click "Add a printer or scanner"
- Wait for printer to appear
- Click printer name → "Add device"
- Driver installs automatically
If printer doesn't appear automatically:
- Click "The printer that I want isn't listed"
- Select "Add a printer using a TCP/IP address or hostname"
- Click "Next"
- Enter printer's IP address (from network config page printed earlier)
- Click "Next"
- Windows detects printer and installs driver
- Click "Finish"
Step-by-Step: Add WiFi Printer to Mac
- Click Apple menu → System Settings
- Click "Printers & Scanners"
- Click "+" (Add printer button)
- Mac scans network
- Printer appears in list (usually within 30 seconds)
- Click printer name
- Click "Add"
- Mac downloads driver automatically
Alternative: Use AirPrint (for compatible printers)
- Most printers since 2012 support AirPrint
- Mac finds them automatically
- No driver download needed
- Just add from Printers & Scanners
WiFi Connection Troubleshooting
Printer not appearing in search:
- Verify printer connected to WiFi (check display)
- Ensure laptop on SAME network (not guest network)
- Restart laptop WiFi: Turn off, wait 10 seconds, turn back on
- Restart printer
- Move laptop closer to printer
- Download manufacturer's app (HP Smart, Canon PRINT, etc.)
Connection keeps dropping:
- Assign static IP address to printer in router settings
- Move printer closer to router
- Reduce WiFi interference (away from microwave, cordless phones)
- Use 2.4GHz network instead of 5GHz (better range)
Method 3: Connect Printer via Bluetooth
Time: 3-5 minutes
Note: Only for printers with Bluetooth capability — mostly portable photo printers.
Compatible Printers
- HP Sprocket, HP Tango
- Canon Selphy CP series
- Polaroid ZIP, Mint
- Epson PictureMate
- Brother PocketJet
Windows 10/11 Bluetooth Setup
Step 1: Enable Bluetooth on laptop
- Press Windows + I → Settings
- Click "Bluetooth & devices"
- Toggle Bluetooth to ON
- Keep settings window open
Step 2: Put printer in pairing mode
- Turn printer ON
- Press Bluetooth button (check manual for specific printer)
- Bluetooth light blinks (pairing mode active)
Step 3: Pair devices
- In Bluetooth settings, click "Add device"
- Select "Bluetooth"
- Printer appears in list
- Click printer name
- Enter PIN if prompted (usually 0000 or 1234)
- Click "Done"
- Status changes to "Connected"
Step 4: Install printer app
- Most Bluetooth printers require specific app
- HP Sprocket → HP Sprocket app
- Canon Selphy → Canon PRINT app
- Download from Microsoft Store or manufacturer website
Step 5: Print from app
- Open printer's app
- Select photo or document
- App automatically connects via Bluetooth
- Adjust settings
- Tap Print
Mac Bluetooth Setup
- System Settings → Bluetooth → ON
- Turn on printer (enters pairing mode automatically)
- Printer appears under "Nearby Devices"
- Click "Connect"
- Enter PIN if requested
- Status: "Connected"
- Download printer's app from App Store
Method 4: Network Ethernet Connection
Time: 5-7 minutes
Best for: Office environments, shared printers, maximum reliability.
What You Need
- Ethernet cable (CAT5e or CAT6)
- Printer with Ethernet port
- Available port on router or network switch
Setup Steps
Step 1: Connect printer to network
- Plug Ethernet cable into printer's LAN/Ethernet port
- Plug other end into router or switch
- Turn printer ON
- Wait for link lights (green/amber) on network port
Step 2: Print network configuration page
- From printer menu: Settings → Network → Print Network Config
- Page shows printer's IP address (example: 192.168.1.50)
- Note this IP address
Step 3: Add printer to laptop (Windows)
- Settings → Printers & scanners
- Add printer → "The printer that I want isn't listed"
- Select "Add a printer using TCP/IP address"
- Enter printer's IP address
- Click Next
- Windows detects and installs printer
- Click Finish
Step 4: Add printer to laptop (Mac)
- System Settings → Printers & Scanners
- Click "+"
- Click "IP" tab
- Enter printer's IP address
- Protocol: HP Jetdirect (for most printers)
- Click Add
Using Manufacturer Apps (Easiest Method for Beginners)
Every major printer brand has an app that makes connection foolproof.
HP Smart App
Download: Microsoft Store, Mac App Store, or hp.com
Setup:
- Install HP Smart
- Open app → "Add Printer"
- App automatically finds HP printers on WiFi
- Select your printer
- Follow setup wizard
- Prints, scans, manages ink — all in one app
Canon PRINT App
Download: App stores or usa.canon.com
Setup:
- Install Canon PRINT
- Tap "Add Printer"
- App searches for Canon printers
- Select yours from list
- Complete guided setup
Epson iPrint App
Download: App stores or epson.com
Setup:
- Install Epson iPrint
- App automatically finds Epson printers
- Tap your printer
- Follow prompts
Brother iPrint&Scan
Download: App stores or brother.com
Setup:
- Install Brother iPrint&Scan
- Tap "+" to add printer
- App finds Brother printers
- Select and confirm
Why use apps:
- Simplest connection method
- Handles driver installation automatically
- Includes scanning and maintenance tools
- Better than Windows built-in for most users
Common Connection Problems & Solutions
"Printer Not Found" During Setup
Check:
- Printer is ON and fully initialized
- Laptop and printer on same WiFi network
- WiFi light on printer is solid (not blinking)
- Printer isn't in sleep mode
- Restart both devices
Fix:
- Connect via USB temporarily to install drivers
- Use manufacturer app instead of Windows setup
- Manually add using IP address
Driver Installation Fails
Solutions:
- Download driver directly from manufacturer website
- Run installer as Administrator (right-click → Run as administrator)
- Temporarily disable antivirus
- Try different USB port
- Restart computer and try again
Laptop Doesn't Recognize USB Printer
Check:
- USB cable is data cable, not just charging cable
- Cable is securely connected both ends
- Try different USB port
- Try different USB cable
- Check Device Manager for errors
Fix:
- Device Manager → USB controllers → Update drivers
- Uninstall device from Device Manager, reconnect
- Try printer on different computer to verify it works
WiFi Connection Drops Constantly
Permanent fixes:
- Assign static IP address to printer
- Move printer within 20 feet of router
- Use 2.4GHz network (better range than 5GHz)
- Update printer firmware
- Disable router's band steering feature
Best Practices After Connection
Set as Default Printer
Windows:
- Settings → Printers & scanners
- Click your printer
- Click "Set as default"
- Turn OFF "Let Windows manage my default printer"
Mac:
- System Settings → Printers & Scanners
- Click "Default printer" dropdown
- Select your printer
Print Test Page
- Open Notepad or TextEdit
- Type anything
- File → Print
- Verify it prints correctly
- Check quality, alignment
Install Scanning Software (All-in-One Printers)
- Basic driver only enables printing
- Need full software for scanning
- Download from manufacturer website
- Usually called "Full Feature Software"
Update Firmware
- Check manufacturer website for firmware updates
- Updates fix bugs and improve connectivity
- Usually done through printer settings or app
Quick Connection Checklist
Before starting:
- Printer unboxed completely
- All protective tape removed
- Ink/toner installed
- Paper loaded
- Power cable connected
- Printer turned ON and initialized
For USB connection:
- USB cable connected to laptop and printer
- Windows/Mac auto-installs driver
- Printer appears in settings
- Test page prints successfully
For WiFi connection:
- Know WiFi network name and password
- Printer connected to WiFi first
- Laptop on same network
- Added printer in settings or app
- Test page prints
After connection:
- Set as default printer
- Print test page
- Install full software for scanning
- Update firmware if available
The Bottom Line
Connecting a printer to a laptop takes under 10 minutes once you know the right method for your setup.
The fastest paths:
For easiest/most reliable: Use USB cable — plug in and Windows/Mac auto-installs everything.
For wireless freedom: Connect printer to WiFi first, then add to laptop via Settings or manufacturer app.
For portable printers: Pair via Bluetooth using printer's specific app.
For office/shared printers: Use Ethernet cable for maximum reliability and speed.
If you get stuck: Download manufacturer's app (HP Smart, Canon PRINT, Epson iPrint, Brother iPrint&Scan) — they handle everything automatically with step-by-step guidance.
Your laptop and printer WILL work together. Just follow these steps systematically and you'll be printing within minutes.
Frequently asked questions
How do I connect a wireless printer to my laptop?+
Connect printer to WiFi first using printer's wireless setup wizard (Settings → WiFi Setup → choose network → enter password). Then add to laptop: Windows Settings → Printers & scanners → Add printer → select your printer from list. Ensure laptop and printer are on the same WiFi network. Alternatively, download manufacturer's app (HP Smart, Canon PRINT) which automates the entire process.
Do I need WiFi to connect a printer to my laptop?+
No. You can connect using USB cable (most reliable), Bluetooth (for compatible portable printers), or Ethernet cable (for office printers). USB is the simplest — just plug the cable between printer and laptop, and Windows/Mac automatically installs the driver. WiFi is convenient for wireless printing but not required.
Can I connect a printer to my laptop without a CD?+
Yes, absolutely. Modern laptops don't have CD drives, and CDs are unnecessary. Windows 10/11 and macOS automatically download printer drivers when you connect. For manual installation, download latest drivers from manufacturer's website (support.hp.com, usa.canon.com, epson.com, support.brother.com). Install software requires no CD.
Why won't my laptop find my wireless printer?+
Common causes: (1) Printer not connected to WiFi — check printer display for WiFi icon, (2) Laptop and printer on different WiFi networks — verify both use same network, (3) Printer in sleep mode — wake it up, (4) Printer too far from router — move closer. Fix: restart printer, restart laptop WiFi, use manufacturer's app which finds printers more reliably than Windows.
How do I connect HP printer to laptop via WiFi?+
On printer: touch Wireless icon → Wireless Setup Wizard → select WiFi network → enter password. On laptop: download HP Smart app from Microsoft Store, open app, click "Add Printer", app automatically finds HP printer, select it, follow setup. Alternatively: Windows Settings → Printers → Add printer → select HP printer. HP Smart app is easier and more reliable.
What cable do I need to connect printer to laptop?+
Most printers use USB-A to USB-B cable: rectangular end (USB-A) plugs into laptop, square end (USB-B) plugs into printer. Some newer printers use USB-C. Cable usually NOT included with printer — buy separately for $5-10. Ensure it's a data cable, not just a charging cable. Any cable labeled "printer cable" or "USB 2.0 A-to-B" works.
Can I connect a printer to a laptop with Bluetooth?+
Only if printer has Bluetooth capability — mainly portable photo printers (HP Sprocket, Canon Selphy, Polaroid). Enable Bluetooth on laptop (Settings → Bluetooth → ON), put printer in pairing mode, select printer from Bluetooth devices, connect. Install printer's specific app (HP Sprocket app, Canon PRINT). Standard home/office printers use WiFi or USB, not Bluetooth.
How do I connect my old printer to a new laptop?+
If old printer has USB: connect with USB cable, Windows/Mac installs generic driver. For full features, download driver from manufacturer's website for your printer model — select Windows 10/11. If manufacturer stopped supporting your printer model, Windows may have built-in driver or try older Windows 7/8 driver in compatibility mode. Very old printers (10+ years) may not work with Windows 11.
Why does my laptop say "driver is unavailable" when I connect printer?+
Driver not installed or incompatible with your Windows version. Fix: uninstall printer from Settings → Printers, then download latest driver from manufacturer's official website for your exact printer model and Windows version. Run installer as Administrator, restart laptop, reconnect printer. Don't use Windows auto-install for older printers — get driver directly from manufacturer.
How long does it take to connect a printer to a laptop?+
USB connection: 2-3 minutes (plug in, automatic installation, test print). WiFi connection: 5-10 minutes (connect printer to WiFi, add to laptop, install driver, test print). Using manufacturer's app: 7-10 minutes including app download and setup. First time takes longer; subsequent setups take 2-3 minutes once you know the process.